Spotify one of the greatest music streaming apps loaded with tons of useful features. Spotify has a feature known as ‘Friend’s activity‘ which shows what someone is listening to or was just listening to if you are following them. To prevent this there is one useful feature the ‘Private Session‘ mode that is available inside the app.
Let’s be honest people always seeing what you are listening to can be a bit creepy at times and there a few cases reported where people were being stalked from their listening history. And if you have connected your Facebook account with Spotify then all your Facebook friends who use Spotify are able to view what you are listening to.
That could be a very big privacy concern for many and if you are one of them here ‘s how you can prevent it by using the Spotify private session –
What does private session on Spotify mean?
Page Contents
Spotify private session is Spotify’s version of private or incognito mode but it’s not so simple and private. Let me explain it to you what it actually means when enabled it does not show what the user is listening to people who follow the person and to the person’s Facebook friends who are on Spotify. Also, no user activity is shared on Spotify social and no updates are shared on Facebook or Last.fm if connected.
A private session will automatically end when you close the app, it’s the same for all platforms. When opening the app again you will have to enable private mode again to get it started. It might also get disabled after a prolonged time of inactivity, even if the app was open the whole time. Also the music you are listening to when in the private mode, does not influence your playlists and recommendations, this has been confirmed by Spotify.
How to enable Private Session?
It just takes a few clicks and taps to enable private session in Spotify, depending on the device that you are using. Here’s how you can enable private mode –
1. Enable private session on Desktop/Laptop
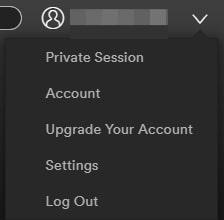
- First, make sure that you are logged in to your account. Then look at the top right corner, where your username is displayed and click on the dropdown arrow and you will see an option for “Private Session“, enable that and you have a private mode for Spotify.
- If you are unable to get the option in the dropdown menu, then go to your account settings from the same menu.
- Scroll down to the Social section and then enable the option “Start a private session to listen anonymously“. Then you’ll have private mode turned on in Spotify.
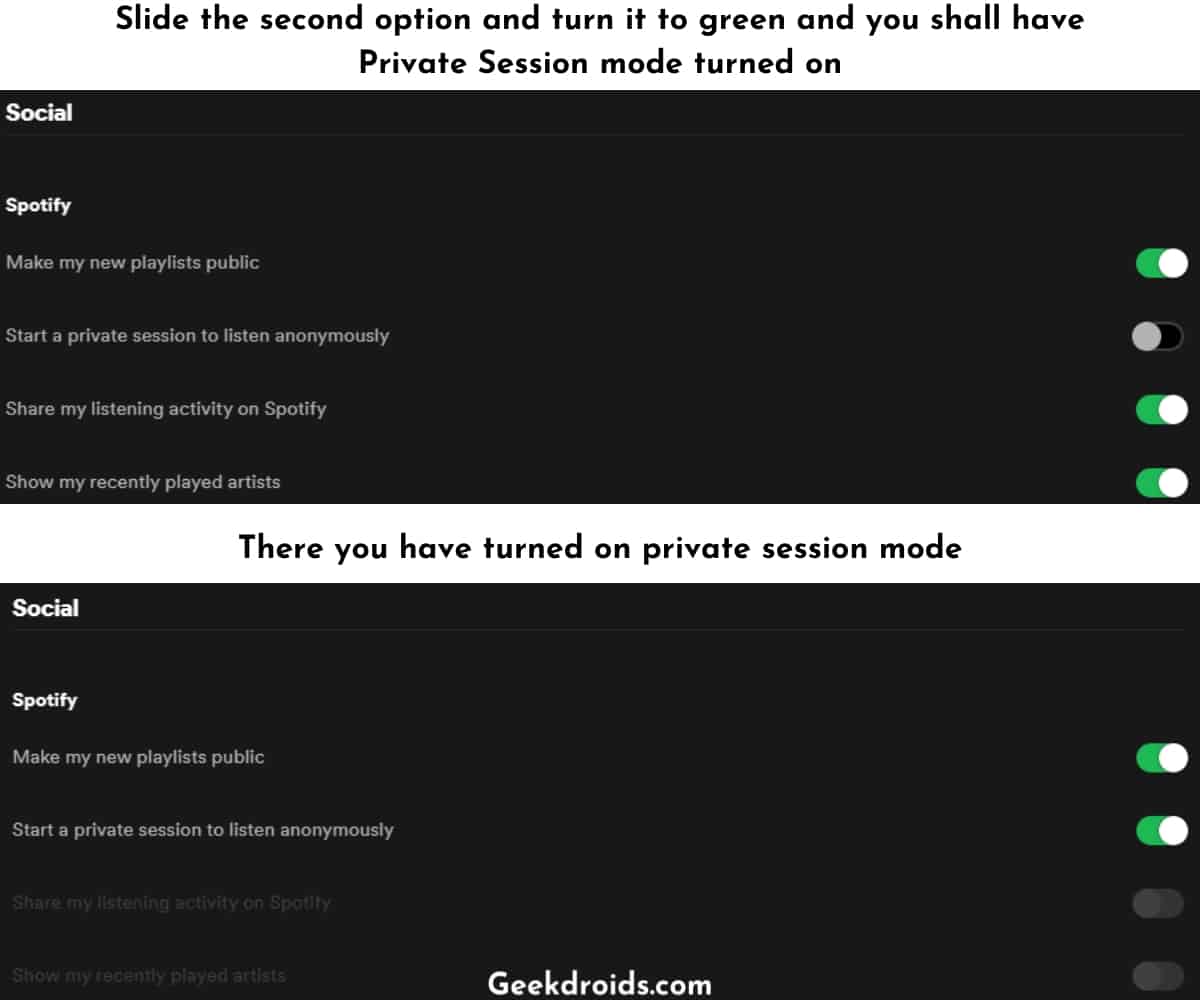
- A small lock sign beside your username is the confirmation that private session in on and anything you are listening to is not being shown to your followers or Facebook friends.

2. Enable private session on Mobile
There are options both in the iPhone and Android app versions of Spotify to enable private session. Also, check out how to make a Spotify mini player? Here’s how you can enable it –
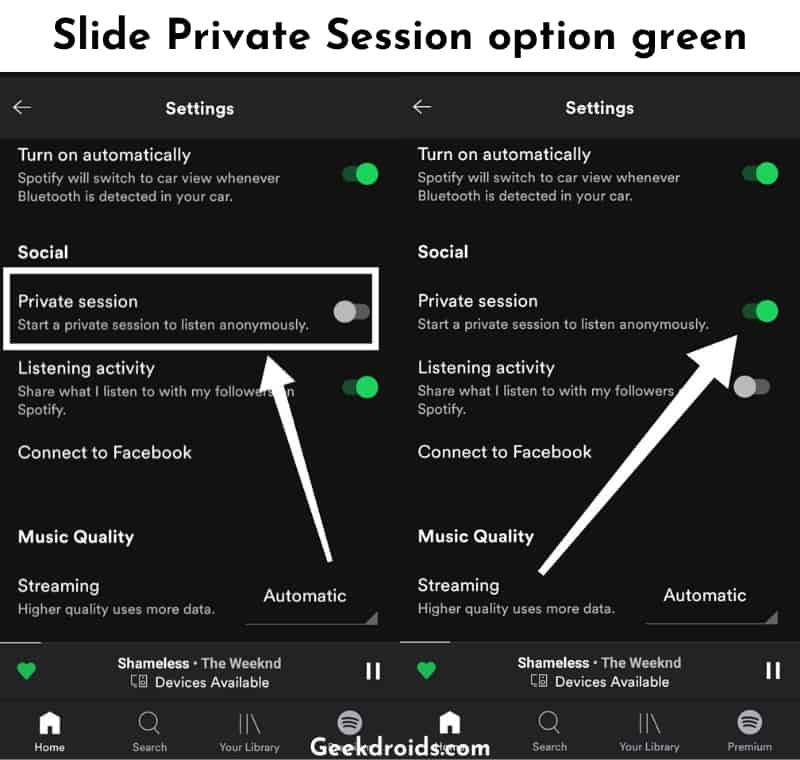
- Open the Spotify app and then open your account settings.
- Scroll down to the social section and you will see any option to enable “Private Session“, turn the slider green and private mode will be turned on in Spotify.
Remember that private mode ends every time you close down the Spotify app, so make sure to turn on private session every time you open the app for listening to music.
Few Spotify Privacy Tips
Using private session is fine and it clearly protects you from a lot of trouble by hiding your listening history, so no one will be able to know that if you were online recently. Here are some tips related to maintaining your privacy on Spotify –
1. Make your playlists secret
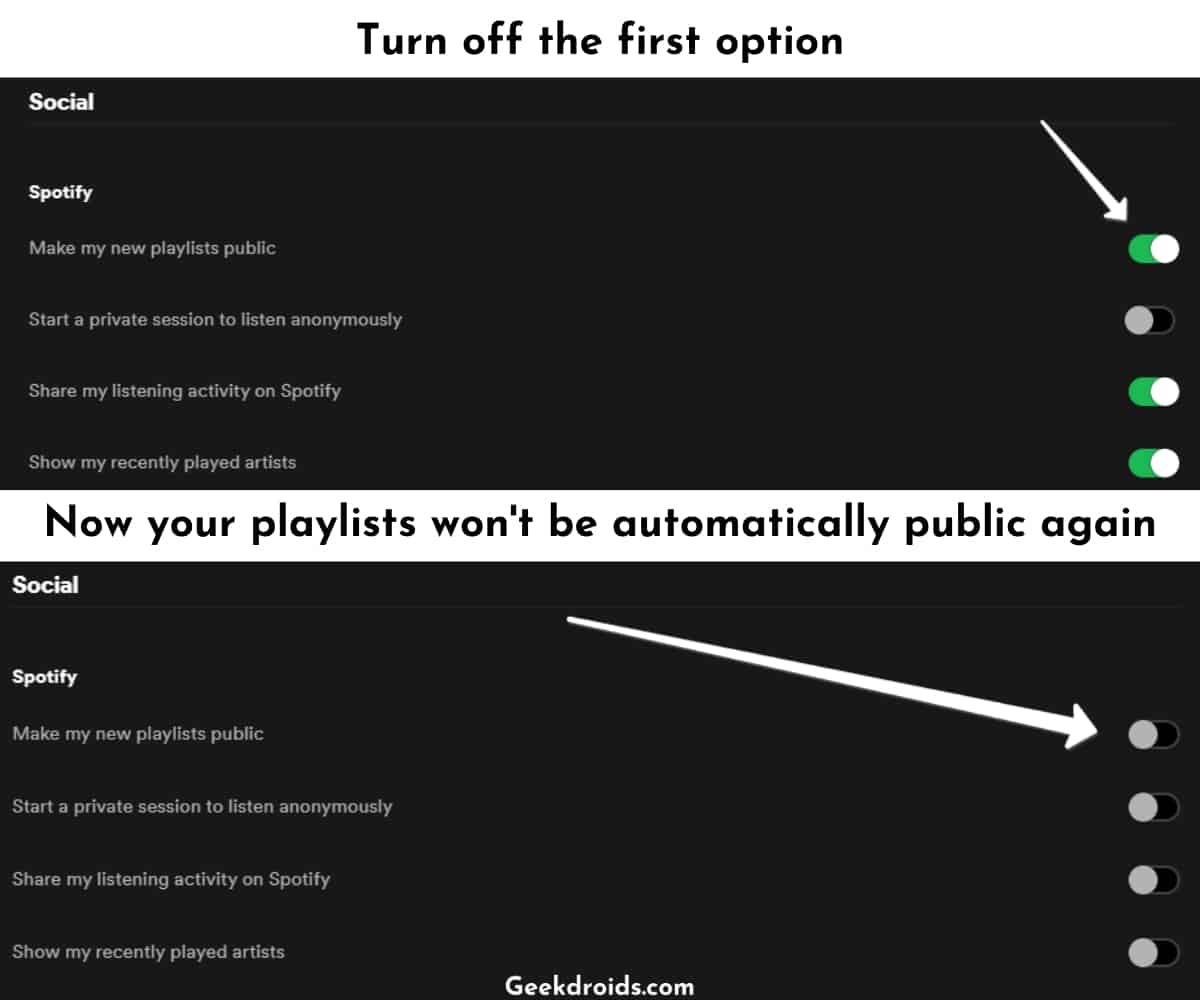
- Turning the privacy of your playlists to secret would be a good place to start. Go to your account settings and then scroll down to the social tab and then turn off the ‘Make my new playlists public‘ off. Turn the slider to grey and your new playlists won’t be public anymore automatically.
- But what about the playlists that you have already created? For those, you will have to individually change their privacy settings.
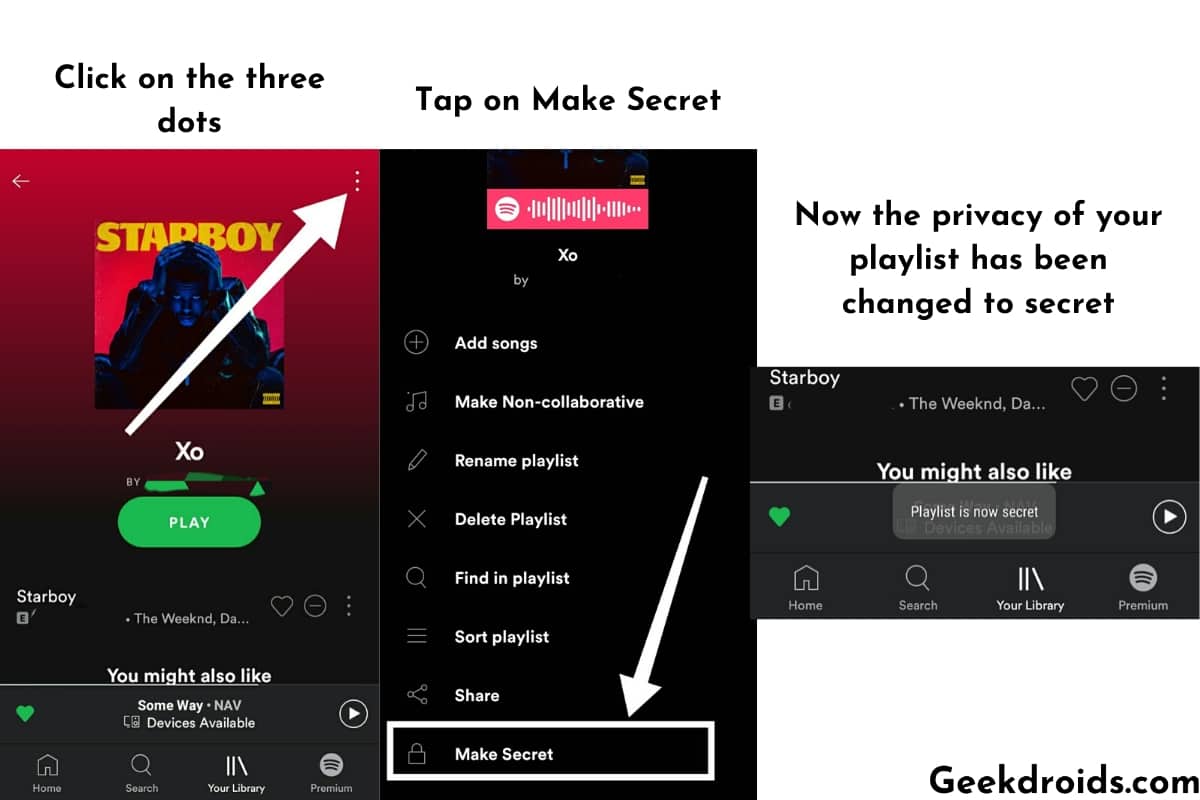
- On the mobile app, open your playlist, then tap on the three dots menu at the top right corner and then tap on the ‘Make Secret‘ option and your playlist’s privacy would be changed to secret from public.
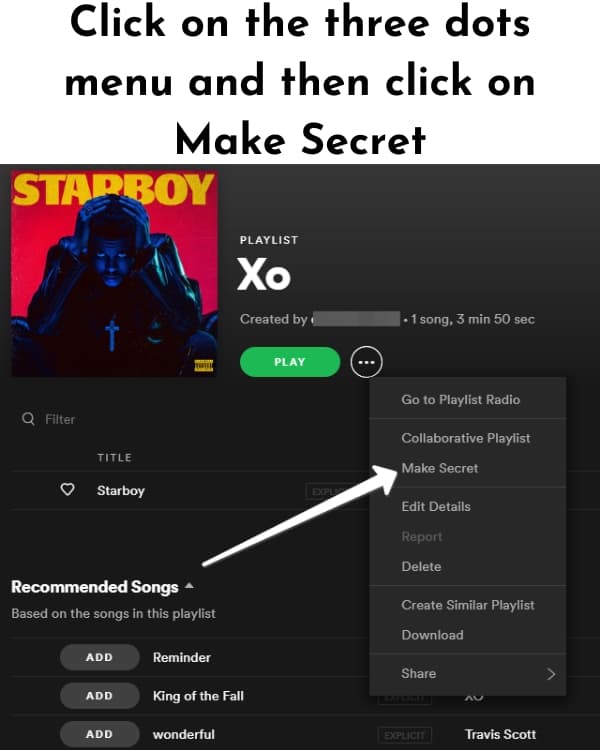
- On the desktop app, open your playlist from your library
- Then click on the three dots menu beside the play button and then click on ‘Make Secret’ and you playlist privacy would be changed to secret from public and no one else except you will be able to access and see that.
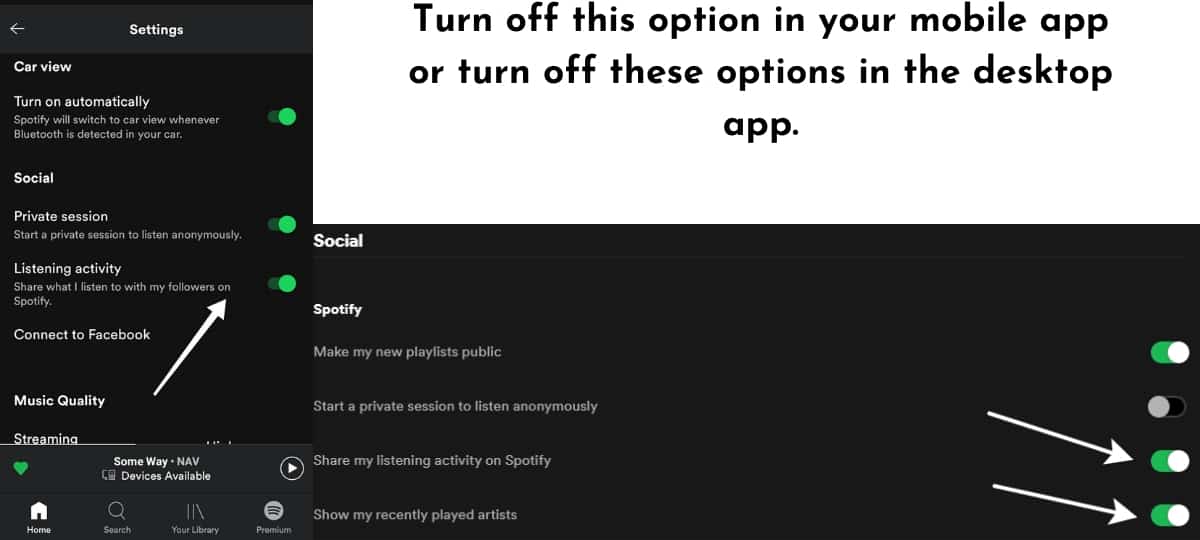
2. Turn off sharing of listening activity
The next thing that you should do to keep your privacy on Spotify intact, is to turn off the sharing of your listening history and recently played artists permanently. Incase you are having problems while logging in with Facebook on Spotify, then learn more about Spotify error 3.
- Open the desktop app and then open settings.
- Scroll down to the Social tab and then turn off the last two options. Which are ‘Share my listening activity on Spotify‘ & ‘Show my recently played artists‘
- And for mobile app users go to settings and then scroll down and then turn off the sharing of listening activity option off.