Windows has definitely become a great operating system in the past few years after the Windows 8 horror show. Windows 10 has great features, looks great and most importantly works well. It is definitely the best option for most people when it comes to a simple operating system for everyday use.
The Start menu is an iconic feature of the Windows operating system and has been present since Windows 95. So it has a long history with users and is definitely loved and used by all users. It is also the most used feature since it makes it easy to quickly locate files, applications and other features of the OS. Therefore if the start menu does not work or not open, then it can cause a severe headache to most users and also slow down their workflow.
Why is the Windows 10 Start Menu not working?
Page Contents
The possible reasons as to why the Windows Start button or menu might not be working are as follows –
- Windows files are corrupted.
- Problems with Windows explorer.
- Antivirus causing conflicts.
- Issues with Cortana.
- New applications causing conflicts.
- User account issues.
How to fix Windows 10 Start Menu or Button not working?
Here are a few tested solutions that can help you fix the Start menu on Windows 10 when it’s not working –
1. Reboot your system
The universal solution to any problem with our electronic devices is to restart them. Similarly, restart your Windows system once before trying any of the other solutions and check if it automatically fixes itself.
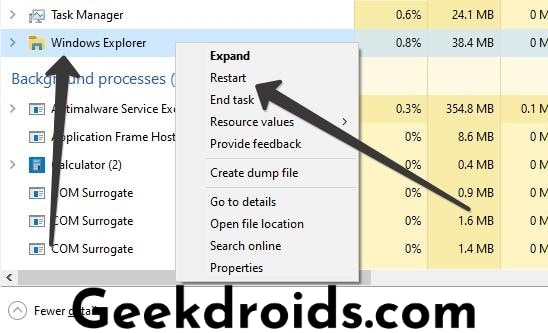
2. Restart Windows Explorer
Many instances have occurred when there was some problem with any part of the Windows system and a simple restart of the Windows explorer seems to have fixed it. Here’s how you can restart Windows Explorer.
- Press CTRL+SHIFT+ESC buttons simultaneously to open the task manager or you can right-click on the taskbar and then open the task manager from there.
- When the task manager pops open, look for the Windows Explorer program name from the list.
- After locating it, right-click on it and click on restart.
- Now the Start menu should work normally.
3. Reset Cortana app
Cortana is an integral part of the Start menu and any error within it can make the whole start menu malfunction. Follow the steps below to reset its data –
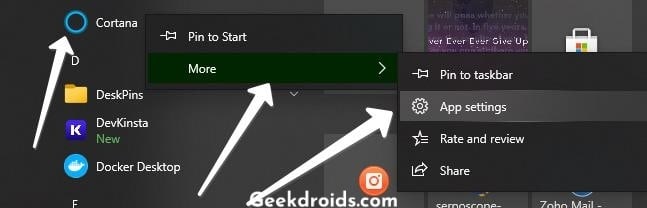
- Locate the Cortana app on the Start menu and right-click on it.
- Then click on More, then on App Settings.
- Inside the app settings, scroll down and click on the ‘Reset’ button it completely reset the app’s settings and its data.
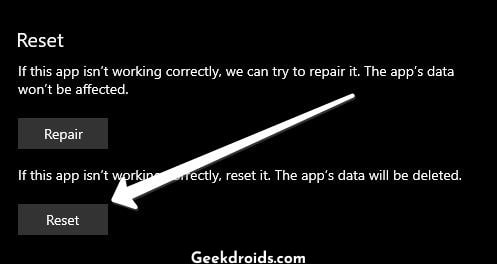
- Your Start menu search should work properly from now on.
3. Run Windows File Checker
Windows has several system files that are important for it to function properly, if any files get corrupted then several features of the operating system can malfunction such as the Start menu not working.
Luckily there is a program from Windows which can find the corrupt files and fix them automatically. Follow the steps below –
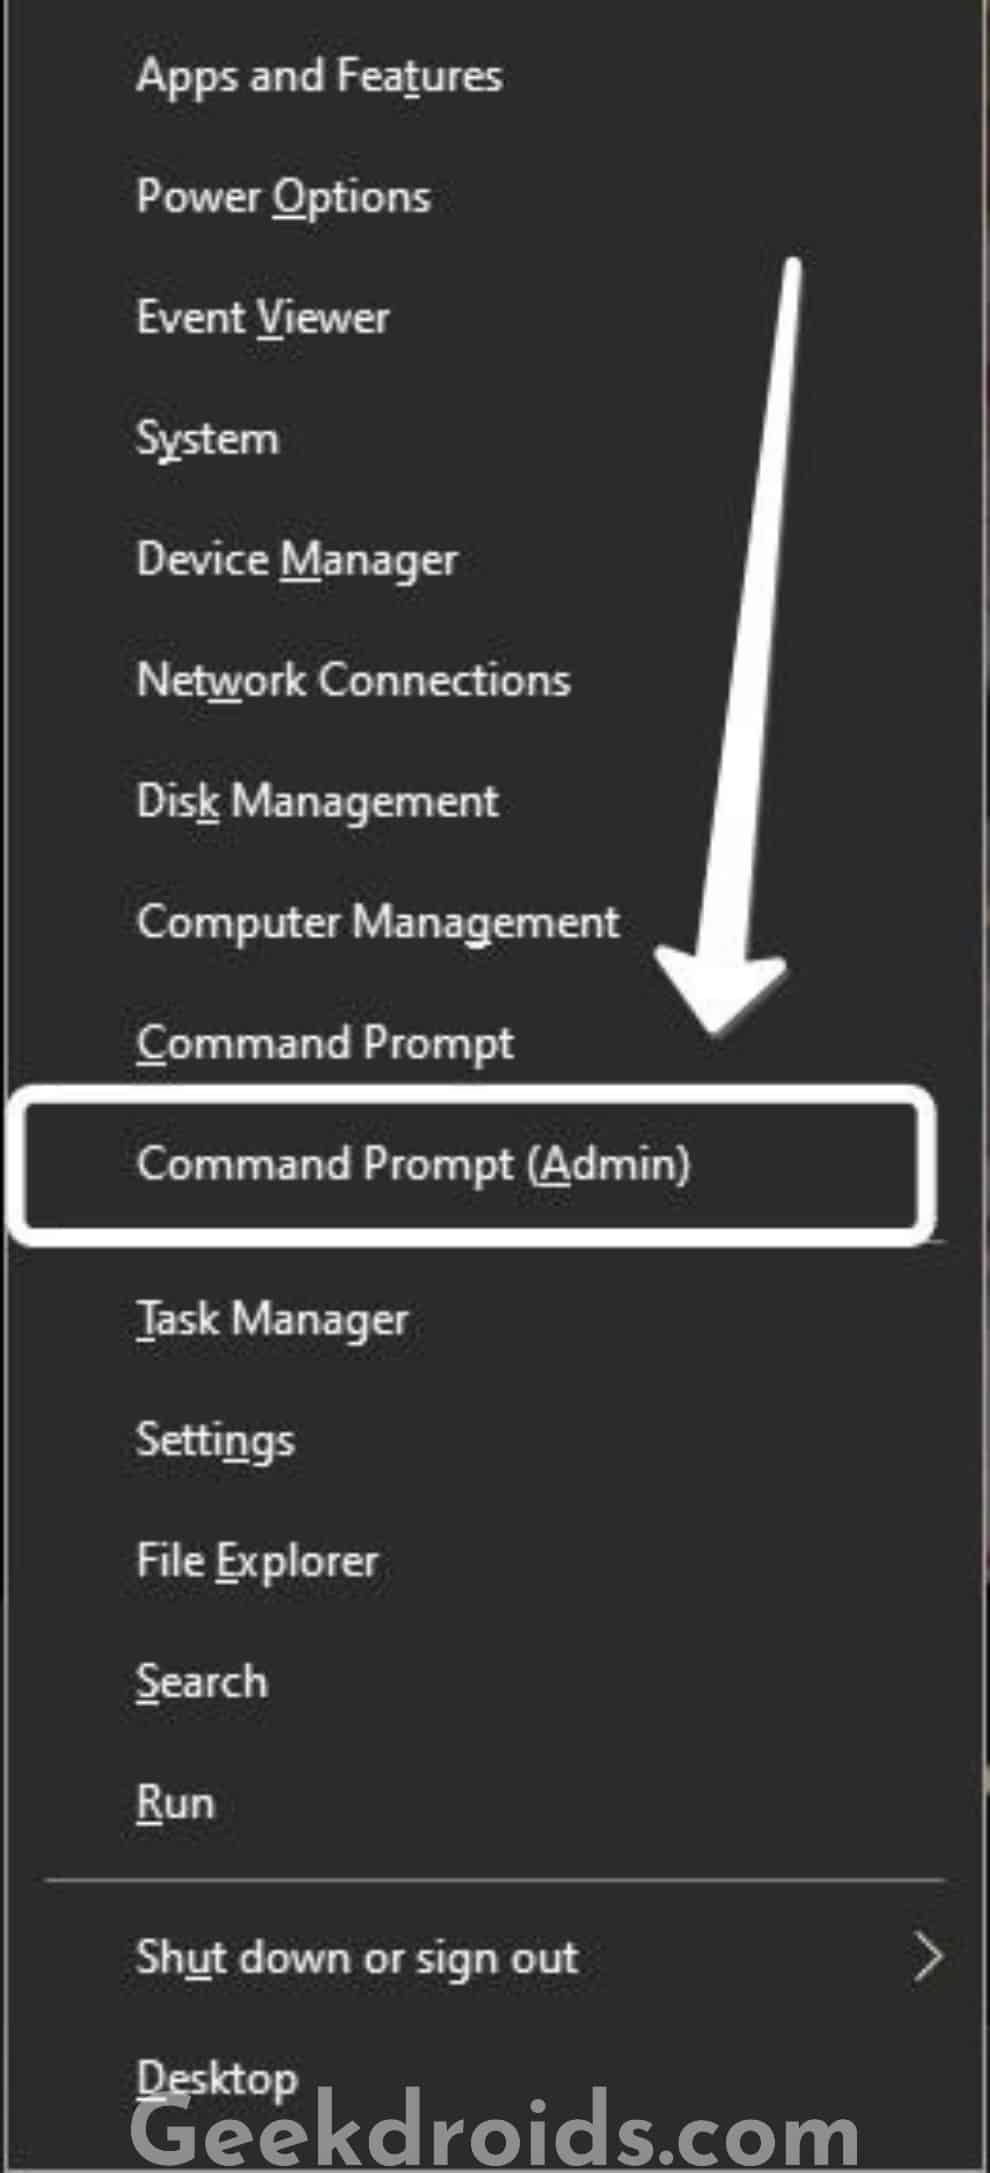
- Press the Windows button + X to open the power menu and click on the ‘Command Prompt(Admin)’ to open Command Prompt in admin mode. When prompted for administrator permission click on ‘Yes’.
- Now type in ‘sfc /scannow’ and press enter.
- The File checker will check all system files for corruption and will try to repair any corrupted ones by replacing those.
- The scan should last anywhere between 5-15 minutes and you will see this message when the scan is complete.
- If there were any problems found by the program then, type the following command to fix those – ‘DISM /Online /Cleanup-Image /RestoreHealth’.
- Now press enter and let the program works its magic, it will repair all files automatically.
5. Restart Windows in Safe Mode
Many users who have faced a similar problem claim that entering Windows safe mode can fix this problem. Here’s how to enter safe mode in Windows –
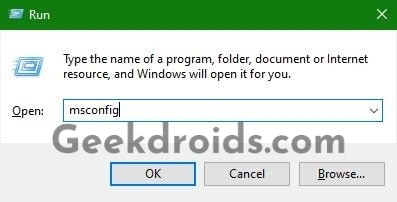
- Open Run by pressing Windows+R & enter ‘msconfig’ and press enter.
- The System configuration windows will open up, click on the ‘Boot’ section.
- Tick the ‘Safe boot’ option and also tick the ‘Minimal’ option. Then click on ‘Ok’ and save it.
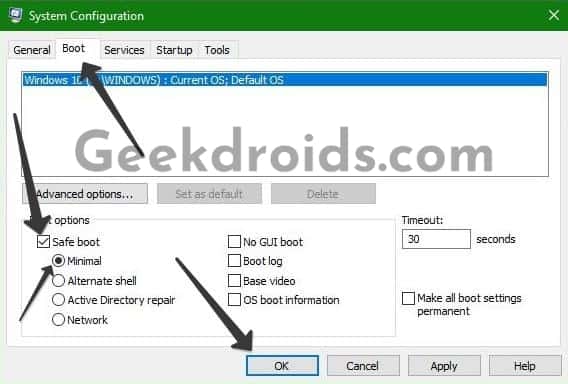
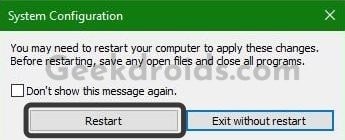
- Then when the confirmation window appears, click on the button to restart Windows in Safe mode.
- Then once your system has booted into Safe mode, repeat the same steps but this time uncheck the ‘Safe boot’ option and restart your system.
- After it has restarted in normal mode, your start menu should work now.
6. Reset Windows
Resetting Windows will delete all your app data but do remember that this method should be your last resort as this will completely factory reset your system and you will have start from fresh again.
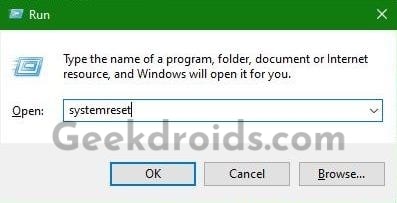
- Open Run by pressing Windows+R and type in ‘systemreset’ and press enter.
- Click on the ‘Keep my files’ option preserve all your data and then wait a few mins.
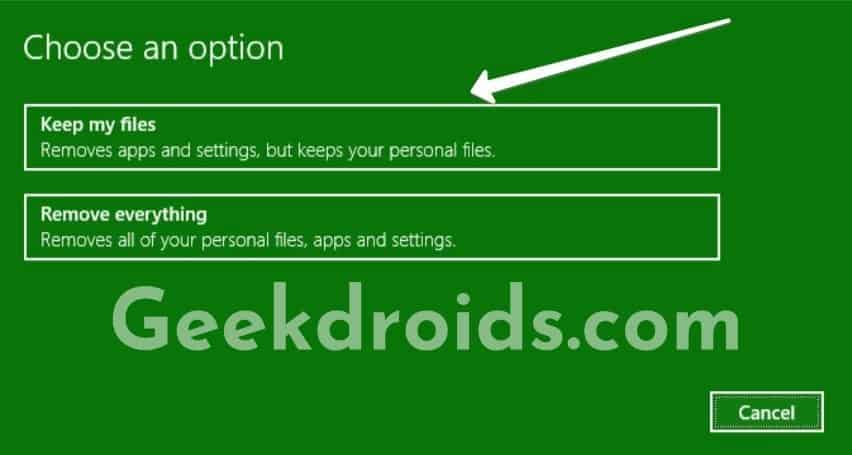
- Then keep on following the on-screen instructions to completely reset your system.
7. Disable Antivirus
Sometimes the antivirus that you have installed on your computer can be the culprit causing problems with the Start button. Disable the antivirus that you have currently installed temporarily and check if the start menu is working.
If the start menu starts working then contact that antivirus’s support and inform them about the problem or else just uninstall it because you already have Windows Defender protecting your system.
8. Rebuild Files Index
Indexing of files, applications and other features of Windows happens automatically by Windows so that when you search a keyword in the Start search field Windows can show you results to that. Indexing helps in performing searches faster. Rebuilding the index can your problem with the start menu. Here’s how to do that –
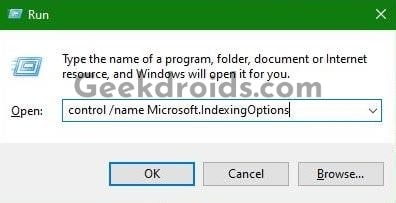
- Press Windows+R and open Run or alternatively you can also open it from the power menu by right-clicking on the start button.
- Type the following ‘control /name Microsoft.IndexingOptions’ and press enter.
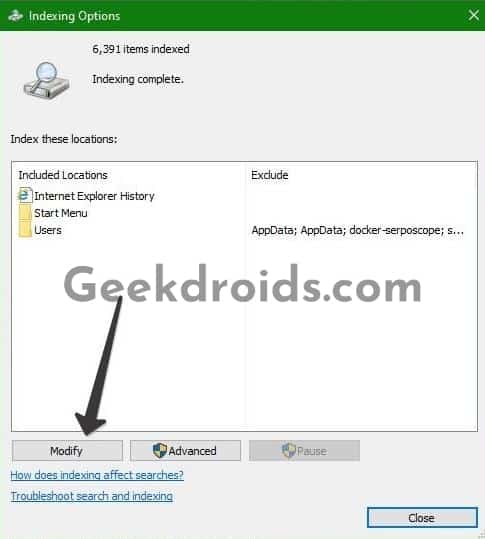
- Then when the Indexing Options window opens up, click on the ‘Modify’ button.
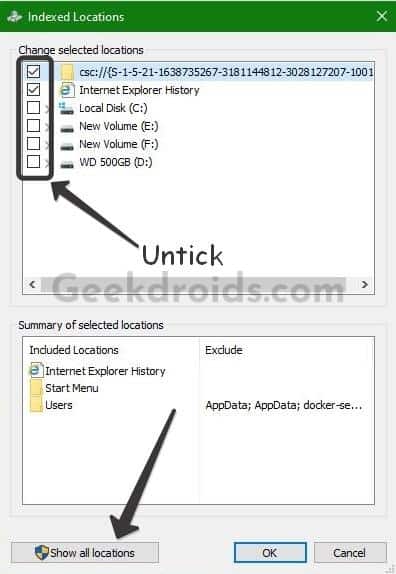
- On the next window, click on the ‘Show all locations’ button.
- Now untick all the options from the top section which are ticked.
- Then go back to the previous window of “Indexing Options” and click on the ‘Advanced’ button.

- Now click on the ‘Rebuild’ button in the Troubleshooting section. It will now take some time to rebuild the index.
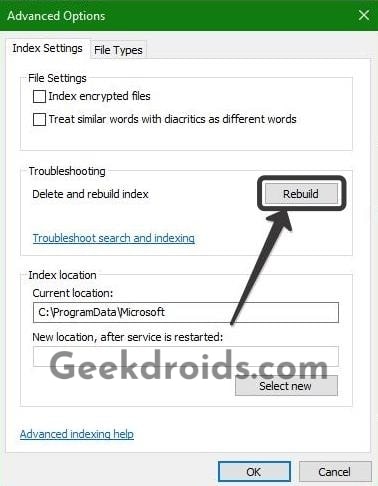
- After rebuilding has been completed, restart your system and then try again with the Start menu.
9. Other solutions
If you recently installed any new applications and after that, the Start menu stopped working, then that particular application could be causing conflicts. Uninstall that application and then restart and then check if the Start menu started working again.
You could also use the media creation tool to create a new installation media to install a clean fresh version of Windows, but don’t worry you will have the option to retain all your data but this is a long and tedious process.
You could also try creating an alternative user account in Windows with administrator privileges and then log in to that account and check if the start menu is functioning properly.