Internet problems are extremely frustrating when all your work is to be done online and some weird error pops up whenever you try to access the internet. Especially this ‘the default gateway is not available’ error that Windows users face when there is some trouble with their network adapters or routers.
Users have reported their WIFI or their internet constantly disconnecting or dropping and showing the default gateway is not available error. This error can be caused as a reason of improper configuration of your router or there could be a third party software installed on your device which might be interfering with your internet or there could be problems with your network adapter drivers.
Running the Windows troubleshooter shows the following ‘the default gateway is not available’ error when run.

But before we get into fixing the error first let’s learn what is the default gateway and what role does it play in our networks and devices.
What is the default gateway?
Page Contents
A default gateway can be defined as a node or a communication endpoint in a computer network which acts middle man or an intermediary between your computer network and other networks such as the Internet. The default gateway acts as an access point to other networks for your devices in your local network. It servers as a forwarding host when no other route is specified.
How to fix the default gateway is not available in Windows 10?
Before you try any of the solutions listed here if you are using a wifi router give it a restart along with your computer and then try accessing your internet. If even after restarting the error keeps on popping up, its time to try out the solutions which we have written about below –
1. Change router settings
You will need to alter the internet settings in your router if you are using one and if you are using a direct ethernet connection then you will need to alter your internet settings from the network adapter option.
- First, contact your internet service provider’s support and get to know all the correct details of your connection like your IP address, gateway, subnet mask and your DNS.
- Then if you are using a router, open the router’s admin page which is usually 192.168.0.1 and reconfigure your internet settings with the correct details which you received from your service provider.
- If you are using internet directly via an ethernet cable, then you will need to change the internet settings in the network adapter settings page under Network & Internet settings on your Windows device.
- Open Run and type in ‘ncpa.cpl’ and press enter.
- Then right-click on the network adapter which is currently in use.
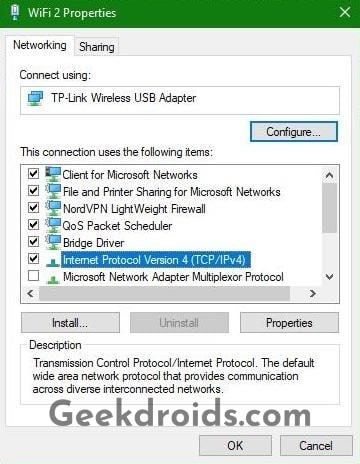
- Then click on properties and then select the ‘Internet Protocol Version 4(TCP/IPv4)’ and click on properties.
- Then enter the details which you received from your service provider and click on ok to save it.
- After that give your device a restart and your internet should work alright then.
2. Update network adapter drivers
You can use software like Driver Booster which will automatically scan for updates for drivers and also install drivers which are not installed or you can manually go to the device manager and update the driver of your network adapter.
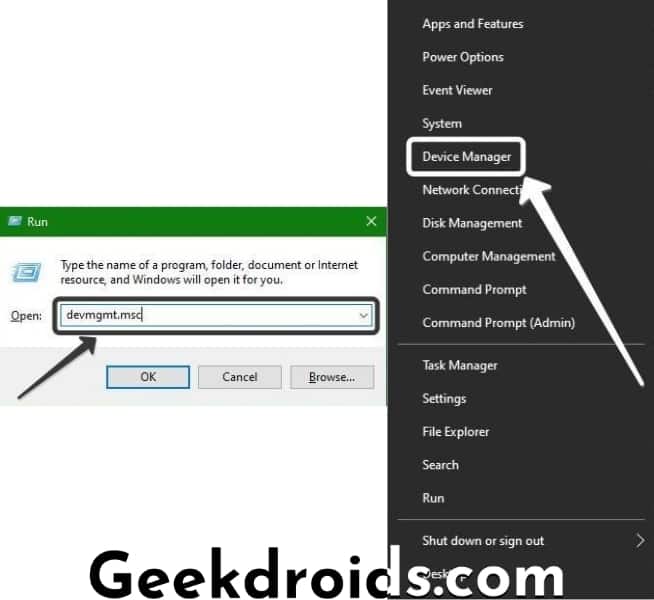
- First open Device Manager by pressing Windows key + X together and then selecting it from the power menu list or by typing in ‘devmgmt.msc’ in Windows run.
- Then expand the Network Adapters option and then right-click on the adapter which is currently being used.
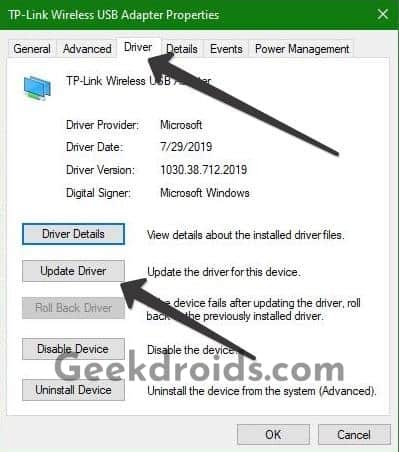
- Click on Properties to open the adapter’s properties.

- Now open the Driver section and then click on the ‘Update Driver’ option.
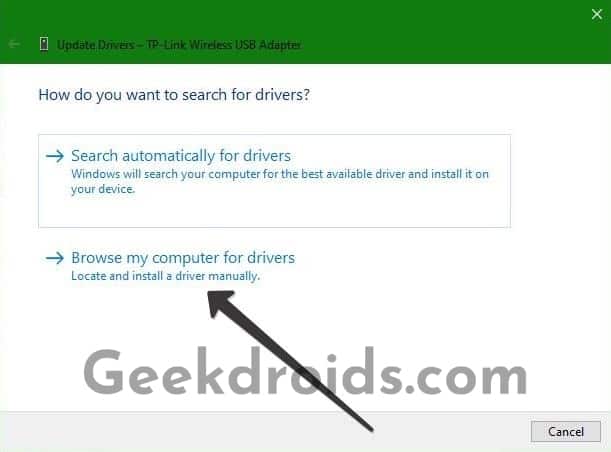
- Then a new window will open up, click on the ‘Browse my computer for drivers’ option.
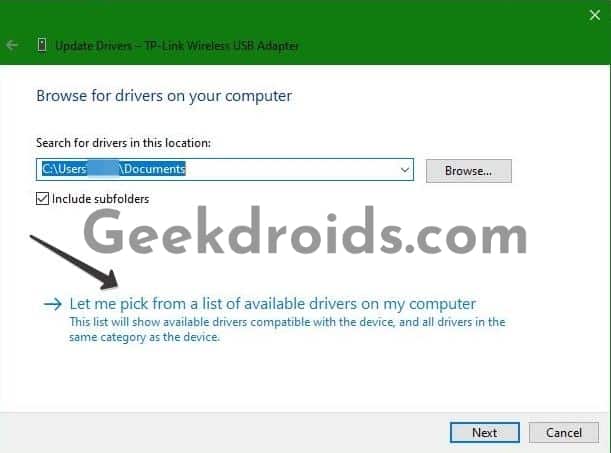
- Then in the next window click on the ‘Let me pick from a list of available drivers on my computer’ option.
- Now select the driver accordingly of the same company as your network adapter was listed in the device manager.
- Then click on ‘Next’ and your network adapter’s driver will be updated, now you can check if the internet is functioning properly.
3. Reset network settings
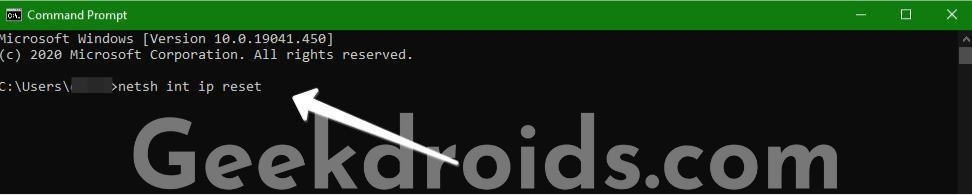
- Open command prompt in admin mode, from the power user menu by pressing Windows Key + X together.
- Then type in ‘netsh int ip reset’ and press enter. Your TCP/IP will be reset now.
- Now try accessing the internet again after closing the cmd window.
4. Change power management settings
Power Management is a feature of Windows which benefits users by saving power by disabling drivers and applications in order to have a longer uptime. So disabling the power management feature and setting it to max performance has fixed the default gateway is not available problem for many users.
- Press Windows Key + X and click on Device Manager from the Power User Menu list or you can open Run by pressing Windows Key + R and then enter ‘devmgmt.msc’ in the text field and then press enter.
- Now in the Device Manager expand the Network Adapter option.
- Then right-click on the one which is currently in use and click on ‘Properties’.
- Hop over to the Power Management section now.
- Tick the option ‘Allow the computer to turn off this device to save power’ and click on ‘OK’ to save it. Now give your device a restart and then try using the internet.

- Alternatively, you can also go to Power Options settings and then to Advanced Power Options settings and change the Wireless Adapter setting to Maximum Performance.
5. Some other solutions
Here are some other solutions or fixes for you to try if none of the above fixed the default gateway is not available error –
- Remove any applications of the Mcafee antivirus if you have installed on your device. These often interfere with our network and cause problems like this one.
- Try changing your DNS to that of Google’s DNS which is 8.8.8.8 & 8.8.4.4 or Cloudflare’s 1.1.1.1 & 1.0.0.1.
- Disable the Windows auto logon feature by setting a password to your local account or just sign in with your Windows account, which would require you to type in a password every time you boot up your computer.
- If you own a dual-band router then connect to the 5ghz band WIFI and then use the internet. Or if you are already connected to the 5ghz band then connect to the 2.4ghz band and try accessing the internet.
- You could also change the channel of your WIFI connection, by going to into the router settings and then try accessing the internet.
- You could also try going into the properties of your network adapter and then the advanced option and altering the options which are available see which one fixes the problem for you.
How to find out your default gateway?
In order to find out the default gateway of your network use the following trick –
1. For Windows
- Open the command prompt window from the start menu.
- Type in ‘ipconfig’ and hit enter.
- All the details of your network connection will appear and if you scroll down you will be able to notice the default gateway.
2. For Mac
- Click on the Apple icon at the top left corner of your screen.
- Then click on ‘System Properties’ from the list.
- Then click on ‘Network’.
- The default gateway will be listed as Router.